

INTRODUCTION
Installing the Lightroom Presets
After downloading the presets file you will have to extract and unzip it, you can use WINRAR or any other similar software for this. Once extracted you'll find a single folder called "WeddingPresets-Collection" inside you'll find the following folders:
- Develop Presets - This is the folder containing 12 Modules of the collection, each modules has its own folder with the presets inside.
- Local Adjustment Presets - This folder contains the "Brushes" modules, inside you'll find all the preset files.
- Documentation - Inside you'll find the Installation Guide, Getting Started Guide and Terms of Service.
STEP 02
Open Lightroom's preset folder
Installing Lightroom presets is an easy process. All you have to do is copy the new presets into Lightroom’s Preset folder.
- 1.- Open Lightroom.
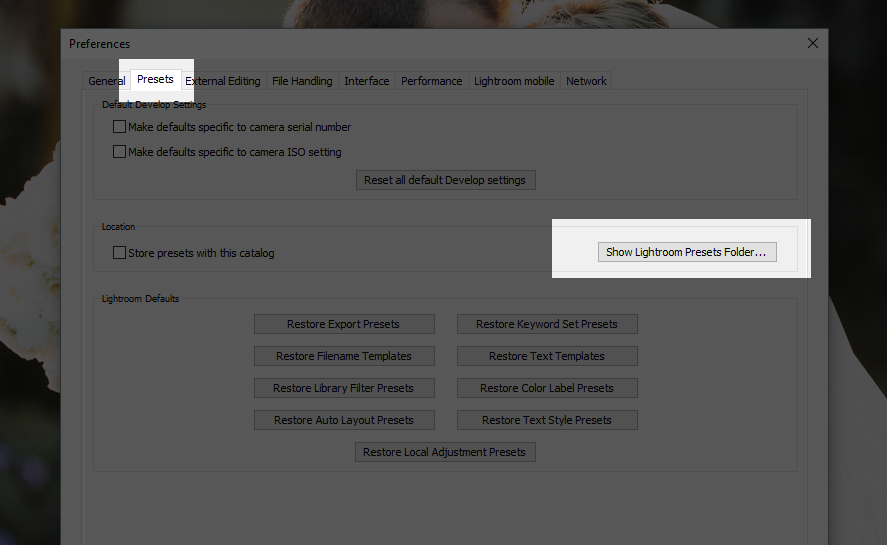
- 2.- Go to Edit > Preferences.
- 3.- Click the “Presets” tab.
- 4.- Click “Show Lightroom Presets Folder”
- 5.- After that, you should see you’re a window displaying the Lightroom presets folder on your computer. Double click it.
STEP 03
Move presets to the correct folder
Once the Lightroom’s Presets folder is open you’ll have to move your new presets inside.
- 1.- On a different window locate your Wedding Presets - Collection folder.
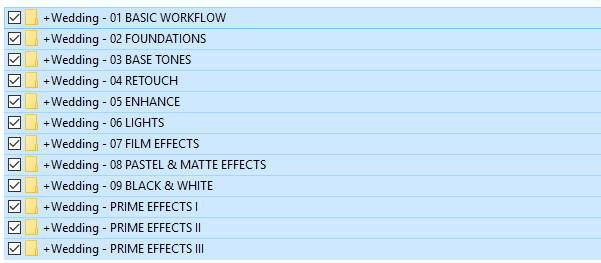
- 2.- Open and copy or move all the folders inside “Develop Presets” to the one with the same name in the Lightroom’s Presets folder.
- 3.- Repeat step 2 for “Local Adjustment Presets”, but this time make sure the files you move go straight to the "Local Adjustment Presets" folder.
STEP 04
Restart Lightroom to use the presets
In order to see and use the new presets you just installed you’ll have to restart Lightroom.
- 1.- Close Lightroom.
- 2.- Close the Lightroom Presets folder.
- 3.- Open Lightroom again.
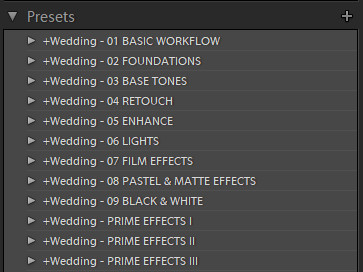
- 4.- You should be able to see your new presets on the left side panel of your screen under “Presets”.
BACKUP EXISTING PRESETS
Backup your presets collection and save them for later use
It is highly recommended that before installing new presets in Lightroom you backup your existing one to prevent any loss. If you haven’t installed any presets then no need to worry.
- 1.- Perform the step 1.
- 2.- Copy these two folders:
- - “Develop Presets”
- - “Local AdjustmentPresets”
- 3.- Paste them into a safe place in your hard drive.